
Why Do Black Spots Appear in ISBM Bottles?: Practical Technical Guide
For Why Do Black Spots Appear in ISBM Bottles?, the objective is not to find one universal setting. It is to prove which combination of spot morphology, conveying path, and external contact produces the required bottle under stable factory conditions.
Spot morphologyDead zonesVerificação
O que este artigo deve provar
Find the source of black spots by isolating contamination, resin degradation, dead zones, hot-runner buildup, screw/barrel deposits, pigment residue and external dirt. A defensible baseline begins with Record size, frequency, whether the particle is embedded or on the surface, and whether it stretches into a streak. The first verification method is Photograph samples by cavity and time. From there, the article follows only checks that can materially change the answer promised by the title. Where an exact operating value depends on the resin grade, bottle drawing, mold, or delivered machine, the approved project specification controls the final setting.
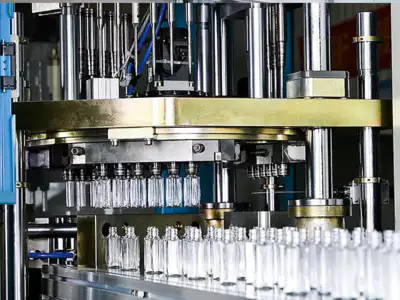
✔️ Spot morphology
Record size, frequency, whether the particle is embedded or on the surface, and whether it stretches into a streak. Photograph samples by cavity and time.
✔️ Raw material
Inspect resin, masterbatch and regrind or recycled-content stream for foreign particles. Check incoming bags, silos, filters and material-change history.
✔️ Conveying path
Inspect loaders, hoses, receivers, filters and hopper for dust, old color and worn components. Clean from the source toward the machine so contamination is not reintroduced.
For a compatibility check, the ASB-12 blow mold compatibility shows the kinds of mechanical and thermal interfaces that should be verified before a tooling or process change is released to production.
Classify the Black Spot Before Cleaning Everything
Spot morphology
Spot morphology. Record size, frequency, whether the particle is embedded or on the surface, and whether it stretches into a streak. Photograph samples by cavity and time. The diagnostic test should show whether spot morphology can physically create the observed defect before a repair or parameter change is accepted. This checkpoint should be evaluated before spot morphology is altered, because otherwise two process mechanisms change at the same time. A surface dust speck and a degraded polymer particle require completely different actions.
Check Material and Conveying First
Raw material
Raw material. Inspect resin, masterbatch and regrind or recycled-content stream for foreign particles. Check incoming bags, silos, filters and material-change history. The diagnostic test should show whether raw material can physically create the observed defect before a repair or parameter change is accepted. For this topic, the engineering log should connect raw material with the observed bottle condition and then test whether raw material supports the same diagnosis. Cleaning the machine will not solve contamination entering continuously with resin.
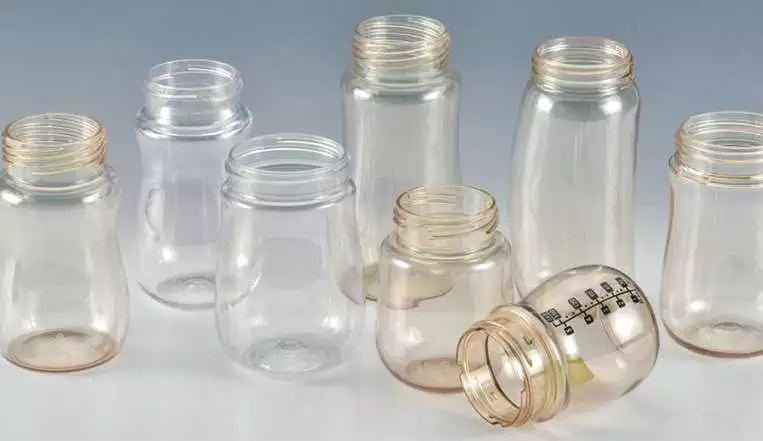
Check Whether Spots Appear in the Preform
Conveying path
Conveying path. Inspect loaders, hoses, receivers, filters and hopper for dust, old color and worn components. Clean from the source toward the machine so contamination is not reintroduced. The diagnostic test should show whether conveying path can physically create the observed defect before a repair or parameter change is accepted. Do not judge this factor from the HMI value alone; pair it with the actual bottle result, then continue with conveying path only after the relationship is clear. Residual black masterbatch in a shared line can create intermittent spots for many cycles.
Preform check
Preform check. Determine whether the spot exists immediately after injection. Compare preforms before they enter conditioning and blowing. The diagnostic test should show whether preform check can physically create the observed defect before a repair or parameter change is accepted. Keep preform check at its validated baseline while this item is tested so the bottle response can be attributed to one cause. If the preform is clean and the bottle is dirty, focus on later contact or external contamination.
Condições de trabalho para esta tarefa específica
- Spot morphology
- Record size, frequency, whether the particle is embedded or on the surface, and whether it stretches into a streak.
- Raw material
- Inspect resin, masterbatch and regrind or recycled-content stream for foreign particles.
- Conveying path
- Inspect loaders, hoses, receivers, filters and hopper for dust, old color and worn components.
- Preform check
- Determine whether the spot exists immediately after injection.
Inspect Purging and Color-Change History
Residence time
Residence time. Look for long stops, low shot utilization or heat exposure that allows polymer to degrade in the barrel or hot runner. Compare spot frequency after extended idle periods and after controlled purging. The diagnostic test should show whether residence time can physically create the observed defect before a repair or parameter change is accepted. Use the smallest controlled change that can prove the effect of residence time, then restore the baseline before a different adjustment such as residence time is tried. High heat plus long residence can carbonize material in stagnant areas.
| Item | Pergunta de engenharia | Verificação prática |
|---|---|---|
| Spot morphology | Record size, frequency, whether the particle is embedded or on the surface, and whether it stretches into a streak. | Photograph samples by cavity and time. |
| Raw material | Inspect resin, masterbatch and regrind or recycled-content stream for foreign particles. | Check incoming bags, silos, filters and material-change history. |
| Conveying path | Inspect loaders, hoses, receivers, filters and hopper for dust, old color and worn components. | Clean from the source toward the machine so contamination is not reintroduced. |
| Preform check | Determine whether the spot exists immediately after injection. | Compare preforms before they enter conditioning and blowing. |
| Residence time | Look for long stops, low shot utilization or heat exposure that allows polymer to degrade in the barrel or hot runner. | Compare spot frequency after extended idle periods and after controlled purging. |
| Dead zones | Adapters, check valves, hot-runner corners or damaged flow surfaces can trap resin. | Use machine and mold maintenance inspection rather than repeatedly increasing purge volume. |
| Condição de liberação | After each cleaning or repair, run enough cycles to observe whether spot frequency changes and record cavity/time patterns. Do not declare success from a handful of clear bottles. | |
Look for Thermal Dead Zones in the Melt Path
Dead zones
Dead zones. Adapters, check valves, hot-runner corners or damaged flow surfaces can trap resin. Use machine and mold maintenance inspection rather than repeatedly increasing purge volume. The diagnostic test should show whether dead zones can physically create the observed defect before a repair or parameter change is accepted. This factor belongs in the setup sheet because it directly changes the conditions under which dead zones is evaluated. A dead zone can release occasional burnt particles long after normal material appears clean.
O ISBM replacement mold design reinforces the practical need to control mounting geometry, thermal behavior, transfer position, and cavity alignment rather than treating the mold as an isolated component.
Inspect Hot Runner, Screw and Barrel at Planned Maintenance
Screw/barrel condition
Screw/barrel condition. Wear, scoring or baked deposits can retain degraded polymer. Inspect during planned maintenance if symptoms persist after material-path cleaning. The diagnostic test should show whether screw/barrel condition can physically create the observed defect before a repair or parameter change is accepted. If the result differs by cavity, compare the local hardware related to screw/barrel condition before moving on to screw/barrel condition. Continuing to run can turn a small buildup issue into repeated customer-visible defects.
Hot runner
Hot runner. Nozzle tips, manifolds and gates may collect degraded material or color. Track whether one cavity produces more spots than others. The diagnostic test should show whether hot runner can physically create the observed defect before a repair or parameter change is accepted. This item is considered resolved only when the finding remains repeatable after thermal stabilization and the next check, hot runner, does not contradict it. A cavity-specific pattern often points toward a local hot-runner or gate source.
Separate Internal Degradation from External Dirt
External contact
External contact. Dust, grease or conveyor debris can attach to the bottle after molding. Inspect immediately at ejection and again downstream. The diagnostic test should show whether external contact can physically create the observed defect before a repair or parameter change is accepted. For repeatability, define who measures external contact, where it is measured, and what bottle evidence is required before checking external contact. Process technicians can waste hours disassembling injection equipment for contamination introduced after molding.
Prove the Source with Time and Cavity Patterns
Verificação
Verificação. After each cleaning or repair, run enough cycles to observe whether spot frequency changes and record cavity/time patterns. Do not declare success from a handful of clear bottles. The diagnostic test should show whether verification can physically create the observed defect before a repair or parameter change is accepted. Record the bottle response beside the setting or measurement for verification; that record becomes the starting condition when verification is reviewed. Intermittent contamination requires sustained observation to prove the source is removed.
External contact: release evidence
Dust, grease or conveyor debris can attach to the bottle after molding. Inspect immediately at ejection and again downstream. The condition is accepted only when the relevant bottle measurement or functional test remains stable after the process reaches normal operating temperature.
Verificação: limite de falha
Intermittent contamination requires sustained observation to prove the source is removed. Use that failure mode as the boundary for the trial and return to the previous stable condition when the bottle response moves in the wrong direction.
O Configuração de ferramentas compatível com ASB Também é relevante ao verificar como as interfaces do molde e o movimento da máquina devem permanecer compatíveis durante a substituição, a resolução de problemas ou as alterações de capacidade.

Questions that arise specifically in Why Do Black Spots Appear in ISBM Bottles?
Why do black spots appear after a machine stop?
Longer resin residence can allow material in hot zones or dead pockets to degrade and release during restart.
Why does only one cavity show spots?
Check its hot-runner path, gate and local tooling before cleaning the entire machine indiscriminately.
Can recycled PET increase black spots?
A recycled stream can introduce additional contamination variability, so incoming quality, filtration and material handling need appropriate controls.
Should I raise purge temperature?
Do not exceed the resin or machine safe procedure. Excess heat can worsen degradation. Follow the approved purge and maintenance method.
How can I tell if a spot is external dirt?
Inspect the bottle at ejection before downstream contact and determine whether the particle sits on the surface or is embedded in the polymer.
Conclusão prática
The final decision on Why Do Black Spots Appear in ISBM Bottles? is made by the bottle, not by a single displayed parameter. Use spot morphology to establish the input, dead zones to test the mechanism, and verification to prove the output under stable conditions. Intermittent contamination requires sustained observation to prove the source is removed.